| Most viewed - The Legend of Zelda |

z1manual-43-44.jpg4810 views
|
|

z1manual-33-34.jpg4803 views
|
|

z1manual-27-28.jpg4691 views
|
|

z3-link-and-impa.jpgLink and Impa4381 viewsSources: Image from the Official Link to the Past Nintendo Player's Guide. Scanned and Edited by Melora. The Illustrator was possibly Katsuya Terada. Notes: I had to think about where I wanted to place this image. Since it was from the LttP guide, but was illustrating back story for the original Legend of Zelda, I decided on this section.Melora
|
|

z1manual-39-40.jpg4341 views
|
|

z3-link-in-dungeon.jpgDungeon Ruins4330 viewsSources: Image from the Official Link to the Past Nintendo Player's Guide. Scanned and Edited by Melora. The Illustrator was possibly Katsuya Terada. Notes: I had to think about where I wanted to place this image. Since it was from the LttP guide, but was illustrating back story for the original Legend of Zelda, I decided on this section. Great picture of Link in a labyrinth.Melora
|
|

z3-link-ever-vigilant.jpgEver Vigilant4144 viewsSources: Image from the Official Link to the Past Nintendo Player's Guide. Scanned and Edited by Melora. The Illustrator was possibly Katsuya Terada. Notes: I had to think about where I wanted to place this image. Since it was from the LttP guide, but was illustrating back story for the original Legend of Zelda, I decided on this section. After defeating evil, Link remains ever vigilant.Melora
|
|

z1manual-41-42.jpg4128 views
|
|
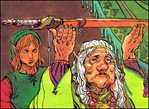
z4-impa.jpgImpa4043 viewsSources: Image from the Official Link's Awakening Nintendo Player's Guide. Scanned and Edited by Melora. Notes: I had to think about where I wanted to place this image. Since it was from the LA guide, but was illustrating back story for the original Legend of Zelda, I decided on this section.Melora
|
|

z3-link-dungeon-entrance.jpgLink at the Dungeons Entrance3925 viewsSources: Image from the Official Link to the Past Nintendo Player's Guide. Scanned and Edited by Melora. The Illustrator was possibly Katsuya Terada. Notes: I had to think about where I wanted to place this image. Since it was from the LttP guide, but was illustrating back story for the original Legend of Zelda, I decided on this section. -Link going to one of the mountain top dungeonsMelora
|
|

z1manual-45-46.jpg3714 views
|
|

Aquamentus.gif3472 views
|
|

z3-link-and-monster.jpgDesert Hazards3400 viewsSources: Image from the Official Link to the Past Nintendo Player's Guide. Scanned and Edited by Melora. The Illustrator was possibly Katsuya Terada. Notes: I had to think about where I wanted to place this image. Since it was from the LttP guide, but was illustrating back story for the original Legend of Zelda, I decided on this section.Melora
|
|

z1-00-cover.jpg3309 views
|
|

THF-booklet.jpg3257 viewsFront of the "Zelda no Densetsu" instruction booklet, from the Famicom re-release.
|
|

z1manual-47-back.jpg3007 views
|
|

Link.jpg2931 viewsLink.
|
|

ganondefeated2.jpg2884 viewsBetter version of above image.
|
|

THF-mapguide.jpg2873 viewsFront of the "Map and Hint Guide" foldout included with the Famicom re-release of "Zelda no Densetsu."
|
|

merchant2.jpg2862 viewsBetter version of above image.
|
|

linkcrouched.jpg2783 viewsLink crouched, with sword and shield ready (from included map).
|
|

fairy2.jpg2766 viewsBetter version of above image.
|
|

overworld.gif2741 viewsThe Overworld of Hyrule, from the manual with the storyline text removed.
|
|

LinkFrontBlue.gif2740 views
|
|
| 385 files on 17 page(s) |
 |
|
2 | |
|
|
|
|
|
|
|
|
|
|
 Register