| Most viewed - Official Art |

g-ether.jpgEther Medallion979 viewsSources: Image from the Official Link to the Past Nintendo Player's Guide. Scanned and Edited by MeloraMelora
|
|

g-jugs.jpgJugs971 viewsSources: Image from the Official Link to the Past Nintendo Player's Guide. Scanned and Edited by MeloraMelora
|
|

b-flute.jpgOcarina or Flute968 viewsSources: Image from the Link to the Past Instruction Booklet. Scanned and Edited by Melora. Note: It was called a flute in the US versionMelora
|
|

b-rods.jpgIce Rod and Fire Rod964 viewsSources: Image from the Link to the Past Instruction Booklet. Scanned and Edited by MeloraMelora
|
|

b-key.jpgSmall Key and Big Key960 viewsSources: Image from the Link to the Past Instruction Booklet. Scanned and Edited by MeloraMelora
|
|

b-tunics.jpgArmor954 viewsSources: Image from the Link to the Past Instruction Booklet. Scanned and Edited by Melora. Note: Only the blue one was in the booklet, I used photoshop to change the color of the other two tunics. The red and blue ones are called Mail in the game.Melora
|
|

g-bottles.jpgBottles954 viewsSources: Image from the Official Link to the Past Nintendo Player's Guide. Scanned and Edited by MeloraMelora
|
|

b-chests.jpgLarge and Small Treasure Chests951 viewsSources: Image from the Link to the Past Instruction Booklet. Scanned and Edited by MeloraMelora
|
|

b-hook-shot.jpgHook Shot941 viewsSources: Image from the Link to the Past Instruction Booklet. Scanned and Edited by Melora. Note: A Heart Piece, a Heart Container, and a Piece of HeartMelora
|
|

b-pegasus-boots.jpgPegasus Shoes938 viewsSources: Image from the Link to the Past Instruction Booklet. Scanned and Edited by MeloraMelora
|
|

b-magical-mirror.jpgMagical Mirror936 viewsSources: Image from the Link to the Past Instruction Booklet. Scanned and Edited by MeloraMelora
|
|

b-magical-decanters.jpgMagical Decanters934 viewsSources: Image from the Link to the Past Instruction Booklet. Scanned and Edited by MeloraMelora
|
|

b-rupees.jpgRupees934 viewsSources: Image from the Link to the Past Instruction Booklet. Scanned and Edited by MeloraMelora
|
|

b-bow.jpgBow926 viewsSources: Image from the Link to the Past Instruction Booklet. Scanned and Edited by MeloraMelora
|
|

g-bomb.jpgBomb922 viewsSources: Image from the Official Link to the Past Nintendo Player's Guide. Scanned and Edited by MeloraMelora
|
|
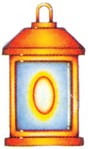
b-lantern.jpgLantern921 viewsSources: Image from the Link to the Past Instruction Booklet. Scanned and Edited by MeloraMelora
|
|
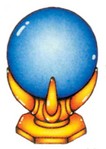
b-crystal-switches.jpgCrystal Switch920 viewsSources: Image from the Link to the Past Instruction Booklet. Scanned and Edited by MeloraMelora
|
|

b-staff-cane.jpgStaff of Somaria and Cane of Byrna919 viewsSources: Image from the Link to the Past Instruction Booklet. Scanned and Edited by Melora. Notes: Sometimes they are call staff's, sometimes canes. Byrna is Blue and Somaria is Orange.Melora
|
|

g-crystal.jpgCrystal Switches917 viewsSources: Image from the Official Link to the Past Nintendo Player's Guide. Scanned and Edited by MeloraMelora
|
|

b-map.jpgMap916 viewsSources: Image from the Link to the Past Instruction Booklet. Scanned and Edited by MeloraMelora
|
|

b-magic-hammer.jpgMagic Hammer913 viewsSources: Image from the Link to the Past Instruction Booklet. Scanned and Edited by MeloraMelora
|
|

b-hearts.jpgHearts911 viewsSources: Image from the Link to the Past Instruction Booklet. Scanned and Edited by Melora. Note: A Heart Piece (top left), a Heart Container (bottom), and a Piece of Heart (top right)Melora
|
|

b-zoras-flippers.jpgZora's Flippers908 viewsSources: Image from the Link to the Past Instruction Booklet. Scanned and Edited by Melora.Melora
|
|

b-moon-pearl.jpgMoon Pearl906 viewsSources: Image from the Link to the Past Instruction Booklet. Scanned and Edited by MeloraMelora
|
|
| 245 files on 11 page(s) |
 |
|
|
|
|
|
|
|
|
|
10 | |
|
 Register